02. Simulation Setup
Simulation Setup
In the previous projects, you have built your simulation environment and a robot. Let us set them up in the Project 3 Workspace for our next tasks.
Navigate to Workspace by clicking the
Project Workspace
on the side bar. You might want to open it in a new window. You could use either the terminal in Classroom without GPU mode or the VNC Desktop with GPU mode to do the setup.
Setup your
catkin_ws
folder as well as the
src
folder, then we need to grab the code from last project. Namely, the package you created to launch the simulation of your Gazebo world and your robot. You could do that in two ways.
Method 1:
git
If you have pushed your submission for the ROS Introduction project to GitHub, go ahead and create a new repository then duplicate your code from last project to it. Substitute the url in the following commands with your project GitHub url.
git clone --bare https://github.com/exampleuser/old-repository.git

cd old-repository.git
git push --mirror https://github.com/exampleuser/new-repository.git

cd ..
rm -rf old-repository.git
_Source: https://help.github.com/articles/duplicating-a-repository/_
Method 2: Folder Upload
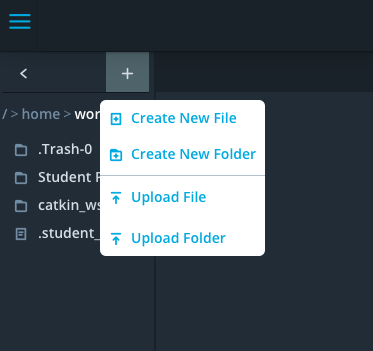
If you want to upload the package folder to the Project 3 Workspace, go to the project Workspace and click the
+
button, then select
Upload Folder
to upload your package folder!
Verify Your Simulation Setup
Do a quick
catkin_make
and source the
devel/setup.bash
script. Launch the world to verify if the system is good to go!
roslaunch <YOUR PACKAGE NAME> world.launch